1. What you will have at the end
By the end of this guide you will have a personal website at an address like https://your-name.github.io. It will have a home page, a page for your work and a CV page. It will work on phones and offer light and dark themes. It costs nothing to run, needs no server, and is yours to change.
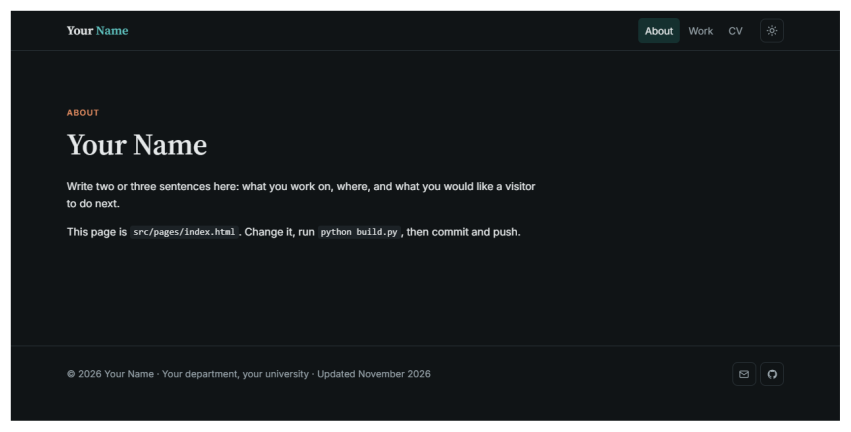
The site you will start from, before you change the words. You can open it at ahmadammar.github.io/academic-site-template.
1.1 Who this is for
You need no experience with code. If you can install a program and follow steps in order, you can do this. Set aside about an hour for the first time, most of it spent on installing things. After that, changing a page takes a few minutes.
Everything you need is in this guide, including in the printed copy. Web addresses are written in full so you can type them.
1.2 How it works, in one paragraph
GitHub offers a free service called GitHub Pages. It takes the files in a repository, which is a project folder stored on GitHub, and shows them as a website. So the job has four parts: get a copy of the template, change the words on your own computer, send the changes to GitHub, and switch Pages on.
1.3 The words you will meet
Git and GitHub have their own vocabulary. You do not need to memorise this table, so come back to it when a word looks unfamiliar.
| Word | Meaning |
|---|---|
| Repository | A project folder whose history Git keeps. Often shortened to repo. |
| Commit | One saved version of your files, with a short note saying what changed. |
| Stage (or add) | Choosing which changes go into the next commit. |
| Push | Sending your new commits from your computer to GitHub. |
| Pull | Bringing new commits from GitHub to your computer. |
| Clone | Downloading a repository, with its history, to your computer. |
| Branch | A separate line of work, which lets you try a change without disturbing the main version. |
main |
The usual name of the main branch. |
| Fork | Your own copy, on GitHub, of someone else’s repository. |
| Pull request | A request asking a project’s maintainers to take in your changes. |
1.4 The terminal, and how to read the commands here
A terminal is a window where you type instructions to your computer instead of clicking. It looks severe, but it only does what you type, and most commands in this guide are safe to repeat.
In VS Code, open the Terminal menu at the top of the window and choose New Terminal. A panel opens at the bottom of the window with a line that waits for you to type. That line is called the prompt. It usually ends in > or $ and shows the folder you are in.
When this guide shows a command, type everything on that line, then press Enter. Where a block shows a line beginning $, the $ stands for the prompt, so do not type it. The lines beneath it are what the computer prints back. Yours will match closely, although codes such as 1a2b3c4 will differ.
If a command prints something you did not expect, nothing is broken. Read the message, because it usually says what to do next. To stop a command that seems stuck, press Ctrl and C together.